Compensação da Laser Line Probe (LLP) usando o driver USB FaroArm 6.0.2.3 e anteriores
Etapas Rápidas
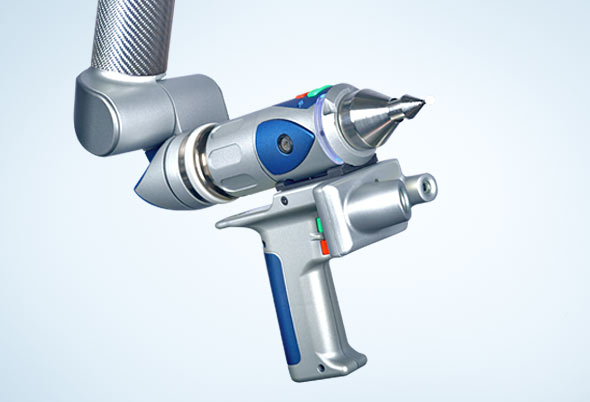
Para garantir que seu projeto tenha os resultados de medição mais precisos, calibre (também conhecido como compensar) sempre seu FaroArm e FARO® Laser Line Probe (LLP) antes de iniciar seu projeto de medição.
- Clique aqui para verificar o número da versão do driver instalado em seu computador para ter certeza de que está usando as instruções corretas. Se o número da versão for 6.0.2.3 ou anterior, use as instruções deste artigo. Caso contrário, clique aqui para usar instruções mais recentes.
- Faça o download dos Manuais do usuário para o FaroArm, ScanArm e Gage apropriados para obter instruções passo a passo sobre a calibração do FaroArm, ScanArm ou LLP.
- Abra o manual e digite Calibração no campo de Pesquisa para encontrar as instruções.
- Assista ao vídeo abaixo para obter uma visão geral de como executar as etapas. É mais fácil fazer isso quando você tem um apoio visual que ensina como o processo deve ser feito.
NOTA: Quando você terminar de marcar os 9 pontos na placa de calibração com a sonda esférica, lembre-se de se afastar da placa e clicar no botão vermelho da alça antes de continuar a calibrar o feixe de laser do LLP.
Video
Neste tutorial de 4 minutos, assista a Michelle Edwards, instrutora da FARO, calibrar o apalpador rígido FaroArm e o LLP. Observe como Michelle se afasta da placa e clica no botão vermelho depois de pegar os 9 pontos na placa de calibração com a sonda esférica, antes de passar a compensar o feixe de laser do LLP. Não consegue visualizar o vídeo? Download do vídeo Download do Video
Preparação
Leia esta tabela antes de começar para garantir seu sucesso.
| Tempo para conclusão | 15 minutos |
| Habilidades Necessárias |
|
| Pré-requisitos |
|
| Compatibilidade | Clique aqui para obter detalhes sobre qual versão do Microsoft Windows é compatível com diferentes versões de drivers de processadores de computador. |
| Software Suportado |
FARO® CAM2® Measure 10.x, CAM2 Measure Q, CAM2 Measure X, CAM2 4.x |
| Hardware Suportado |
|
Veja Também
Keywords:
scanarm, scanner, calibrar, calibração, calibração llp, calibração de sonda de linha de laser, configurações llp, compensação de laser, compensar, compensação